
[PART #2] – [PART #3] – [PART #4]
We live in a time where almost anyone on the planet can create, publish and sell books (or other media) without any insurmountable technical or financial preconditions.
There are already many tutorials out there how to make ebooks. Each one has its own approach. In this short series, I would like to share my own way of creating ebooks while focusing on the open source aspect so that anyone who might be interested can follow the steps of creating, publishing and selling ebooks with freely available software.
What To Write About
Many how-to-make-ebooks guides start by telling you not to write a single word before you do your “market research”. Apparently, the idea is that if you carefully “construct” something, the likelihood that it’ll sell is significantly higher…
It’s not that this is necessarily false, but I find this approach terribly boring and short-sighted. If you are desperate for money, by all means try creating ebooks for specific niches and demands. If, however, you want to share your own personal ideas and create truly unique writings and ebooks, this might not be the best path to pursue, because if you do something radically unique you’ll have to step boldly into the unknown like my friend George’s pioneers.
In other words: if you’re more interested in income than artistic (or academic) expression, have a look on the Amazon Kindle Store bestseller list and try to create something similar. Non-fiction books in the how to category are a good place to start. I also tried there first, just to test the waters and when I saw that it was possible to actually sell my writings there, I brought out more precious and personal ebooks.
In any case, the following guide is designed in a way that you can use it to create ebooks with whatever content you like!
It’s not my job to tell you what to write or how to write, but to illustrate how one might approach formatting, packaging and publishing.
Writing Word By Word: The Manuscript
It’s so fine and yet so terrible to stand in front of a blank canvas – Paul Cezanne
Each book begins with words on a page (or screen). In this section we’ll talk about (one possible way) to create a manuscript that can later be turned into an ebook, and sold on stores like Amazon or iBooks.
Let’s start with a few general notes:
 PDFs are great, but creating ebooks in formats specifically designed for ereading devices such as Kindle, Nook, Kobo, iPad etc. is even better. (PDFs have fixed page layouts and don’t scale down very well on smaller devices, which leads to a lot of unnecessary scrolling and swiping)
- By publishing your ebook in stores such as Amazon, iBooks, Barnes & Noble you’ll get a lot more exposure (and sales) compared to offering paid downloads from your website only.
- It’s possible to convert finished PDFs to the ebook formats required by these stores, but it’s even better to create manuscripts that from the beginning will seamlessly convert!
There are many ways to write and create an ebook which will convert easily to MOBI or EPUB (two of the popular ebook formats used by Amazon, iBooks, etc). In the past I’ve had success with two methods:
- composing the manuscript in an HTML editor such as Kompozer
- writing and preparing the manuscript in Open Office’s Writer
The first option is great, because it gives you full control over the layout, but if you shy away from working with code directly, and have never looked at the brackets and semicolons of HTML or CSS before, the second option will do fine.
Using Open Office’s Writer As Manuscript Maker
Everyone knows how to use Microsoft Word, or Open Office Writer (which is basically the same, only free). That is, everyone uses this software to write letters and recipes, etc. But in my experience many users are unaware of a simple but powerful feature: Styles.
Working with styles will make your writing and layouting life a lot easier, not only, but especially when you want to make a professional ebook.
But what are styles? And why should we bother? Let’s look at the actual software…
Reason #1: Not Using Styles Wastes Your Precious Time
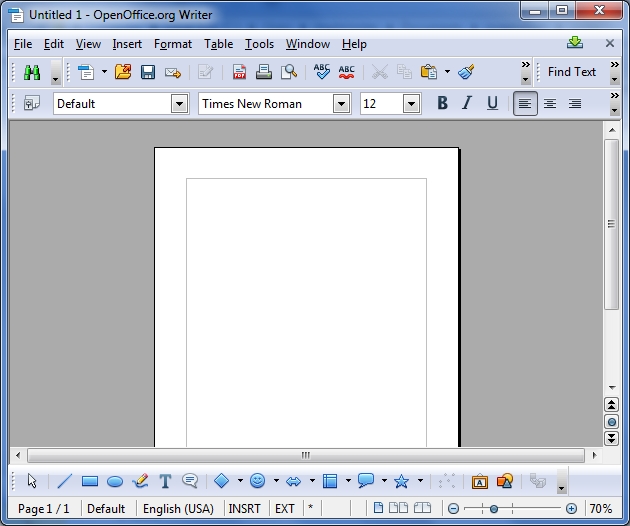
It’s a new document. Not much to see here..Let’s start writing!
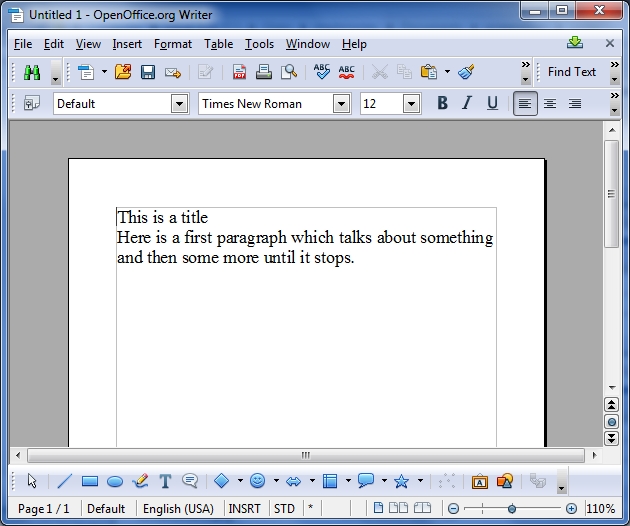
Okay, so there’s a title, and then there’s a very short paragraph. But the title is too small. Let’s make it bigger! Here’s what most people do to change that: they just mark the title and change the font-size.
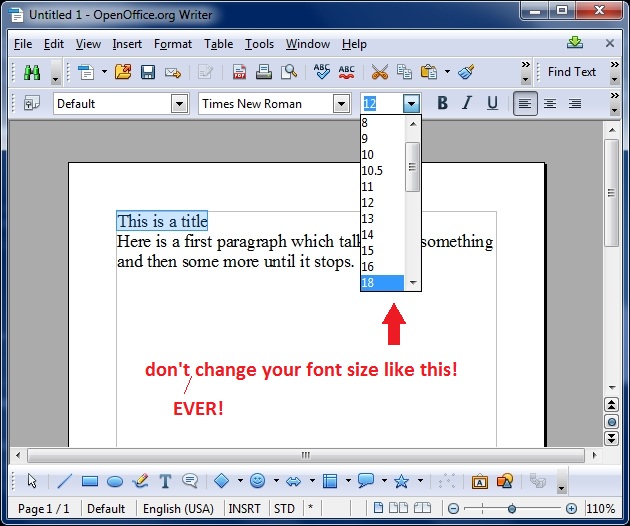
“Why is that so bad?” you might ask. “I’ve always been doing it like that and you have the nerve to tell me not to?”
Well, instead of explaining it, let me show you… Let’s just say we continue in this manner by putting in a second title and a second paragraph and setting it to the same font-size.
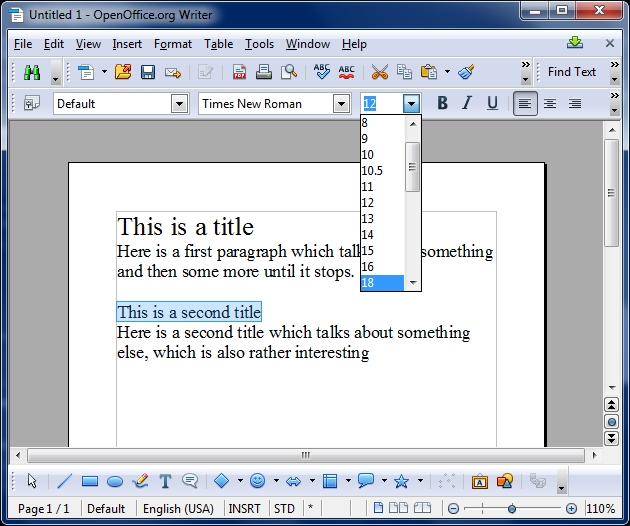
The result would look like this:
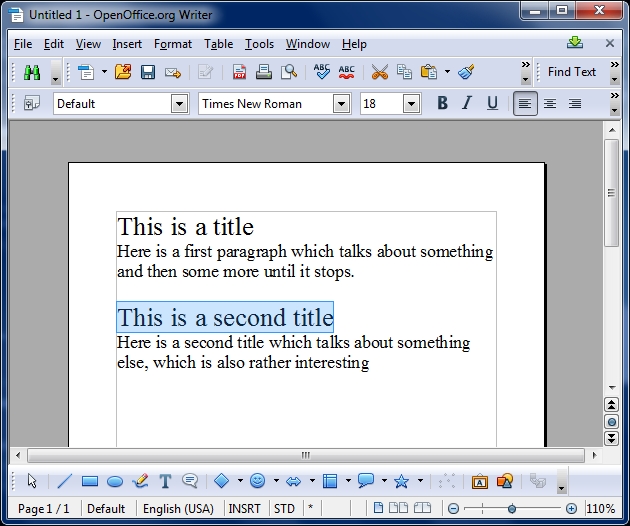
Can’t see any problem with that? Me neither. Seems too look alright. But suddenly after writing a lot of titles and paragraphs you decide that 18 is a bit too big, after all, and you’d like to dial it down to something more modest, let’s say 14.
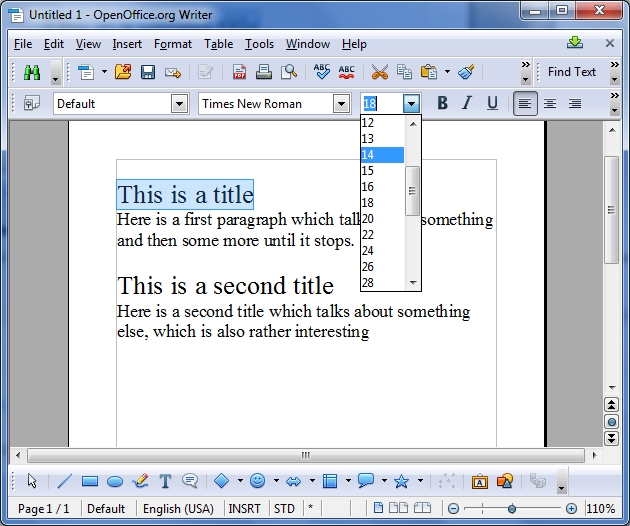
So we go the old route of marking and changing font sizes. First we do it for the first title, then for the second, then….you see the problem? If a book has 400+ titles you’ll have to mark them all and change their font-size by hand! Fun, huh?

Life is too short and beautiful to be wasted by repetitive tasks that can be automatized.
Don’t change font sizes manually. Instead, use styles! – Mr. Skeleton
Reason #2: Modify One, Change All!
So far so good, but we still didn’t talk about what styles actually are and how to use them!
Okay, so let’s just start again from the beginning. To reset all your font-sizes, colors, etc. just mark the whole text and select Format > Default Formatting
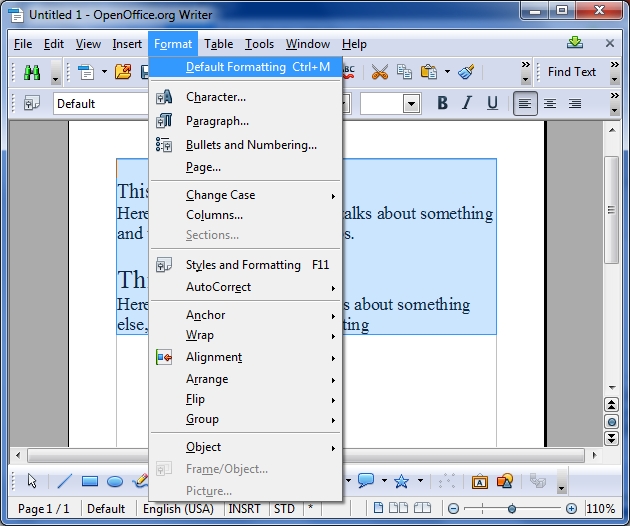
this will reset everything and we’ll be back to square one:
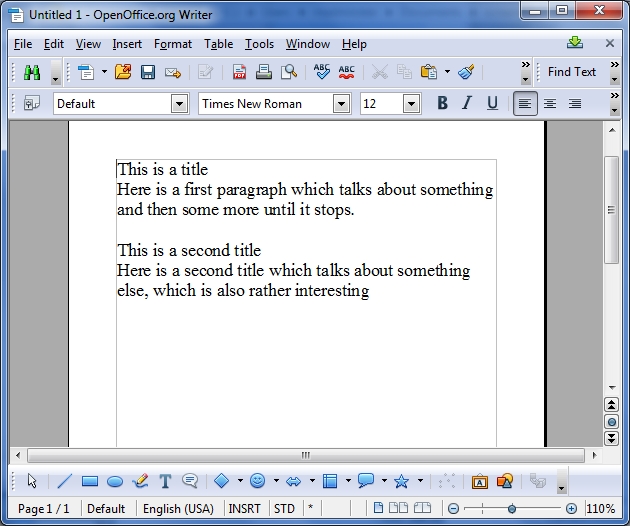
Okay? Now let’s change our title font size the styles way:
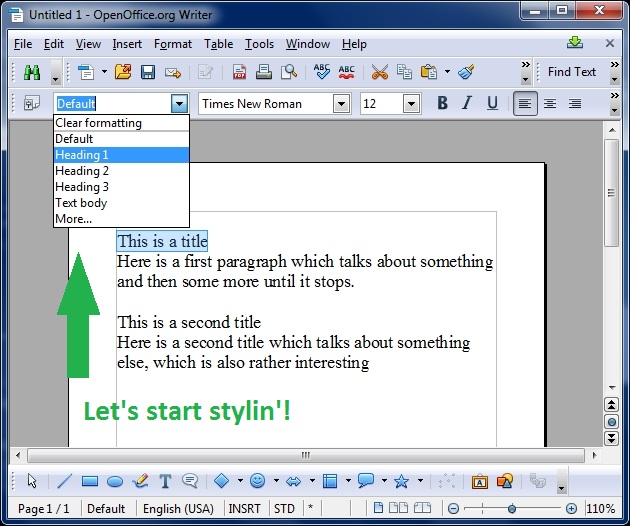
Mark your title, and then select Heading 1 from the styles selector. Then do it for the second title, too:
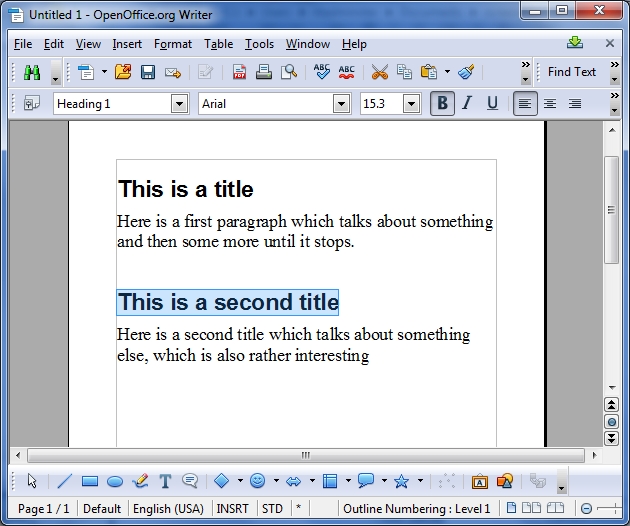
Now, both of the titles have the attribute of “Heading 1“. It’s a bit bigger, but what’s the difference from just changing the font-size? Let’s imagine the above scenario again where, after writing a dozen titles and paragraphs, we have a sudden change of heart and want to change the title font sizes…
Instead of doing it manually and ending up like the skeleton above, we just need to change the attribute for “Heading 1” once. Here’s how:
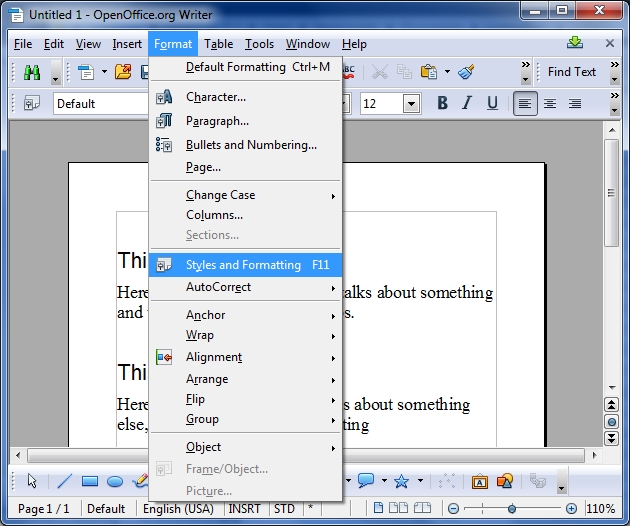
First, go to Format > Styles and Formatting:
It will bring up a new little window containing all your style definitions:
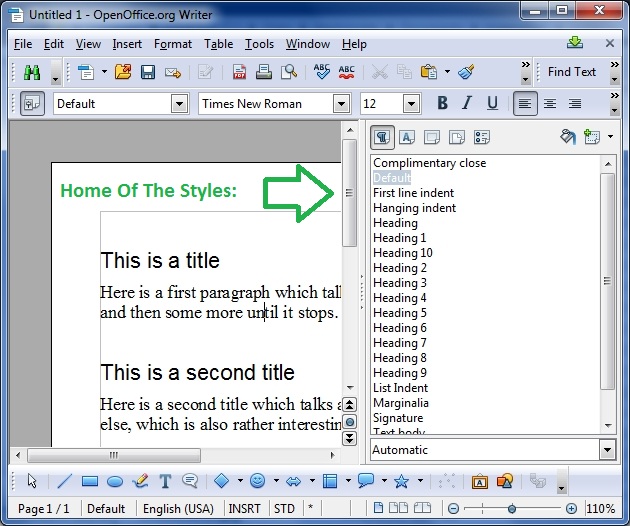
To change a style, do a right click on it and select modify:
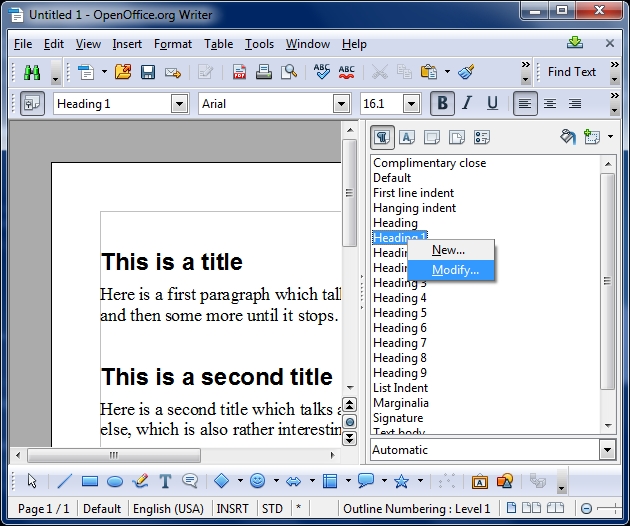
This will bring up another window where you change everything about the selected style!
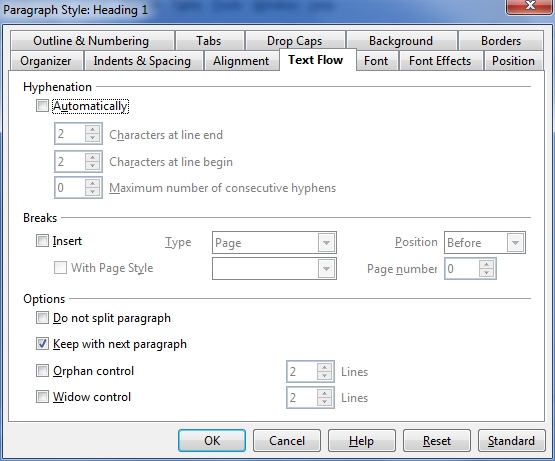
Whew! That’s a lot of tabs and options. Don’t worry, you don’t need to know what they all do. First of all, let’s focus on the Font settings tab:
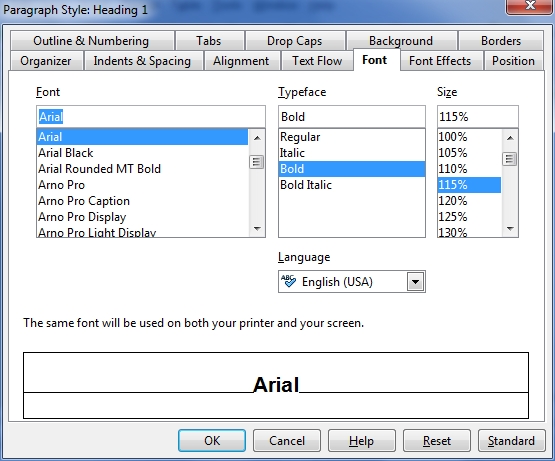
This should look familiar, right?
Just change the font-size and typeface to something else (note: changing the font from Arial to Times New Roman, etc. will not have any direct effect on most ereading devices, where the hardware determines the font, not your document! For now, you can ignore these settings.)
When you’re done, hit save and all your “Heading 1” styles will be updated.
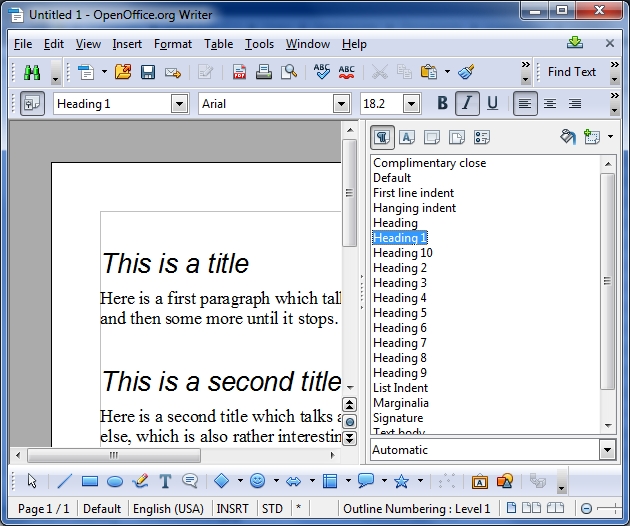
In my example I set the style’s typeface to italic and all my “Heading 1” titles immediately changed to italic. Even if you have 400+ titles, they’ll all receive and reflect their settings based on what you set in the “Heading 1″ style”.
In other words: Modify once, change all!
Here’s another example of a manuscript with a couple of titles.
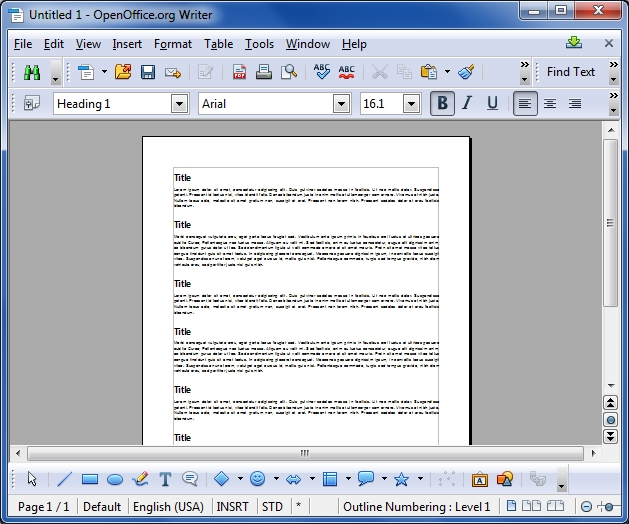
Now I want to have them all centered. Since they’re all set to “Heading 1″ style, I simply open my styles panel…
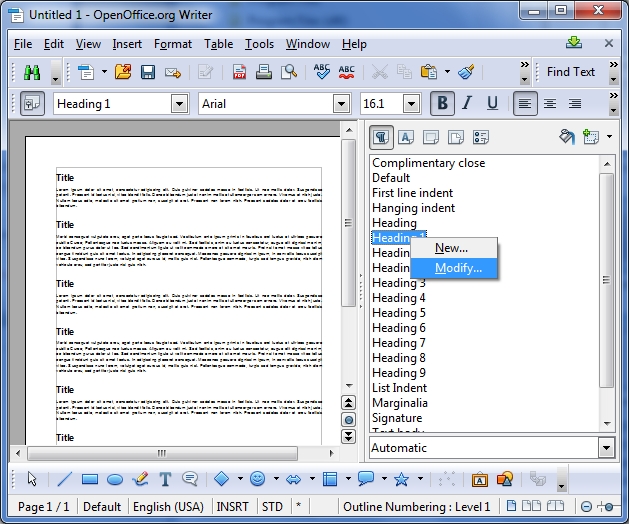
…modify the Heading 1 style…
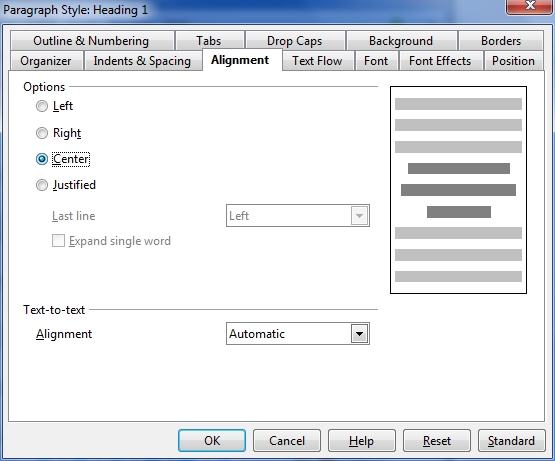
… in the popup I open the tab which says Alignment, select Center, hit OK….
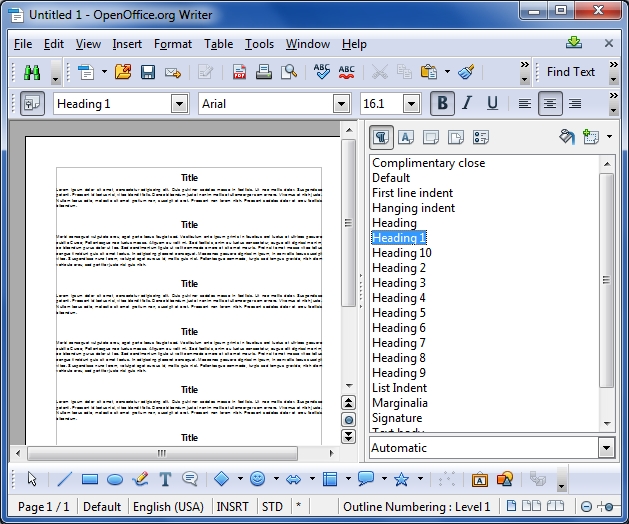
…et voilá! Everything centered with one click.
You get the idea? Whatever formatting attributes you want to apply to your manuscript, don’t do it manually. Instead, use styles! We just talked about Heading styles so far, but the same principle can be applied to paragraphs as well.
— END OF PART #1 —
In the next post, we’ll look at yet another powerful reason for using styles and how to bring structure into your ebook!
—
Was this tutorial helpful? Did I miss something? Was it too difficult to follow? What do you think? Leave a comment!
–
nook photo: CC by allaboutgeorge

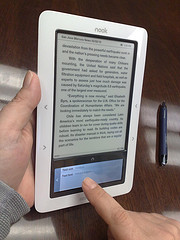 PDFs are great, but creating ebooks in formats specifically designed for ereading devices such as Kindle, Nook, Kobo, iPad etc. is even better. (PDFs have fixed page layouts and don’t scale down very well on smaller devices, which leads to a lot of unnecessary scrolling and swiping)