
[PART #1] – [PART #3] – [PART #4]
Welcome back to the second part of our little ebook making course. For those who missed it, here’s a link to the first part: # 1 Manuscript Styles
Some of you might wonder why we started out by talking about styles. Maybe they seem to make certain formatting tasks a bit more convenient, but apart from that, what’s the connection to ebooks?
Good question!
Styles Generate Structure
By using the predefined heading styles we can automatically order our document, simplify navigating through a long document and even create interactive TOC (Table of Contents) sections for ereading devices such as the Kindle or Nook.
Let’s have a look! (Hey, that rhymed!)
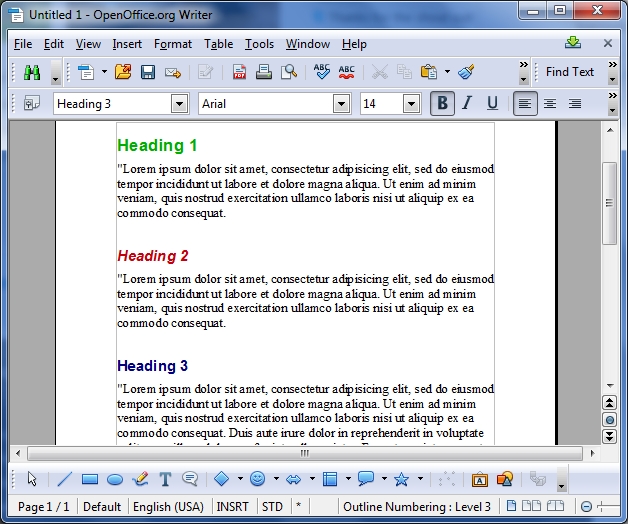
This is a simple document containing three different headings in three different styles. (I colorized them for you to make it easier to differentiate) Apart from the “modify one, change all” convenience we discussed last time, styles bring structure into your document.
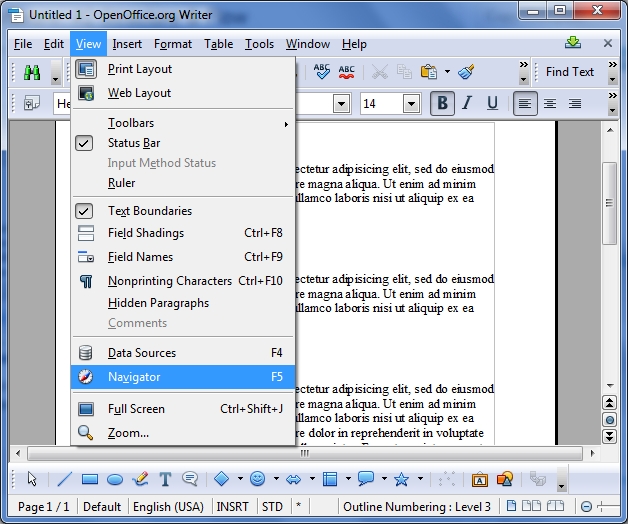
To see this structure go to View > Navigator
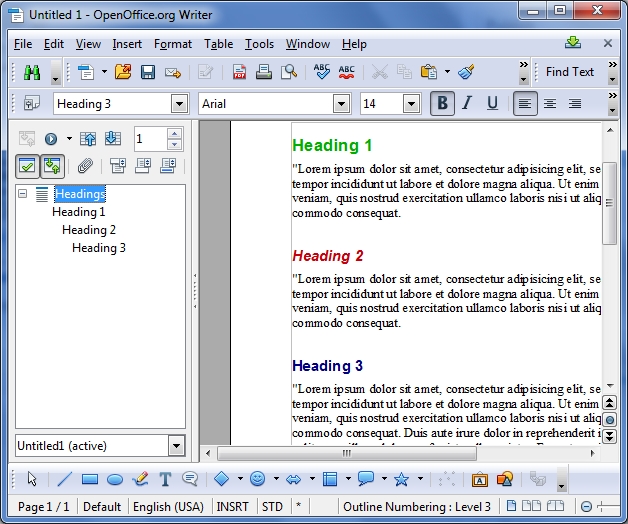
On the left side you can see the Outline of our document. Not only does it allow you to click these headings and quickly jump to the chapters (or headings), they are also automatically in hierarchical order, which is perfect for bringing structure into long documents. Check out the following example:
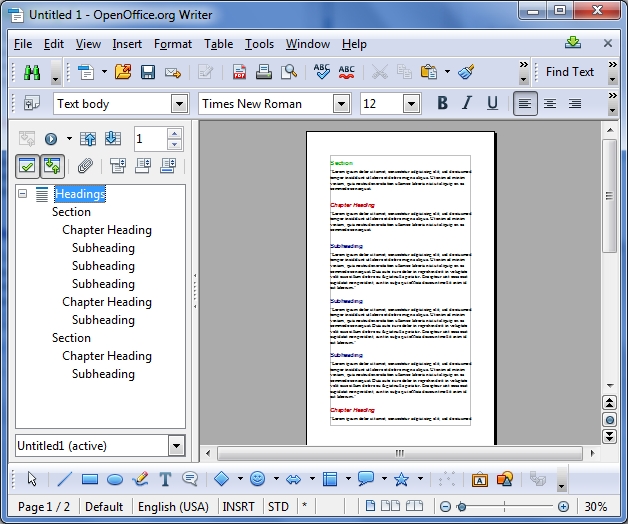
In this example I used Heading 1 styles for my Section headings, Heading 2 for my Chapter headings and Heading 3 for my Chapter Subheadings. By simply applying these pre-configured styles, we suddenly have the skeleton of a book!
Table Of Contents: An Interactive Map for Readers
When the great history of trouble is written, my family will stand extremely high in the table of contents. – Allan Sherman
In the conversion process, which I’ll talk about in future units of this course, these outlines can be easily converted into clickable/tappable TOCs. Here are a few examples:
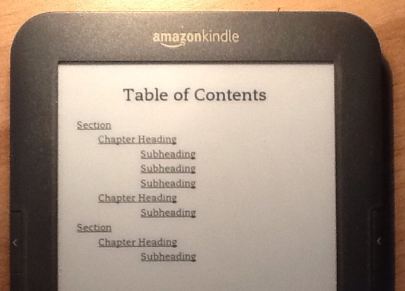
This is how it looks on an Amazon Kindle device.

This is how it comes out on an iPad (Kindle app)
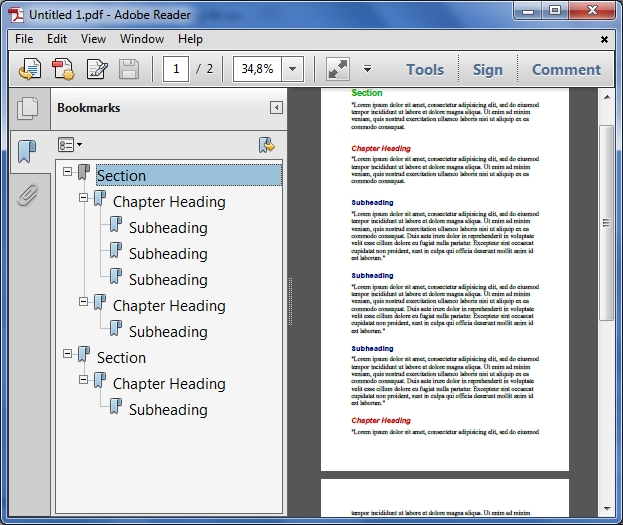
And even, although this is not directly related to our tutorial, PDFs become interactive this way!
(To enable it, click File > Export to PDF and tick “Export bookmarks”)
Quick Summary About Styles
We’ve learned a few things now about styles. Time for a quick recap:
- styles make formatting large numbers text elements simple and consistent: “modify one, change all”
- styles bring structure into your document that helps to keep an overview while writing
- styles can be used to generate clickable/tappable TOCs on ereading and mobile devices or in PDFs
But wait a second…That’s not all! In fact, it’s not even the tip of the iceberg. To illustrate another benefit, let’s do quick comparison between ebooks and books.
Ebooks Don’t Have Pages, Or Do They?
One of the more confusing aspects for people who are getting into the ereading world (whether as a publisher or reader) is the “absence” of pages. To be more precise, pages aren’t exactly non-existent, but they behave very differently.
On a printed page in a book, the words are fixed in a certain position, size and formatting style. With ebooks, all of these factors are dynamic. When I read an ebook on an ereader, I can choose what font-size I like, how much space I want to have inbetween my words, etc. Here’s the settings panel from a Kindle ereader, for example:
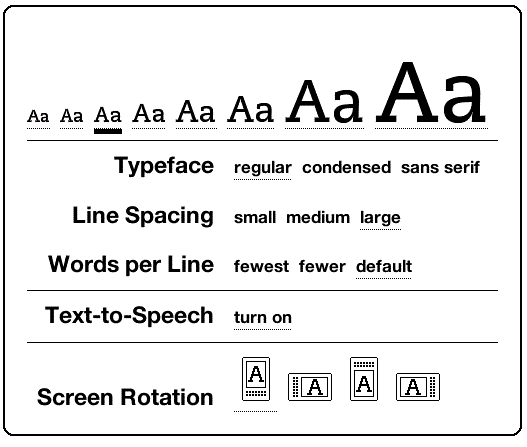
That’s all great. But since at the smallest font-size, the ereader device displays a lot more text on one “page” than at the biggest, pages lose their static definitions which, for example, makes page-numbering difficult.
But there’s another aspect of bookmaking that has to be revisited under this aspect.
Of Page Breaks And Broken Flows
I don’t think there is anything wrong with white space. I don’t think it’s a problem to have a blank wall – Anna Freud
In every book we’ll find a phenomenon that bookmakers call page breaks.
Here’s an example of a page break in a physical paperback book:
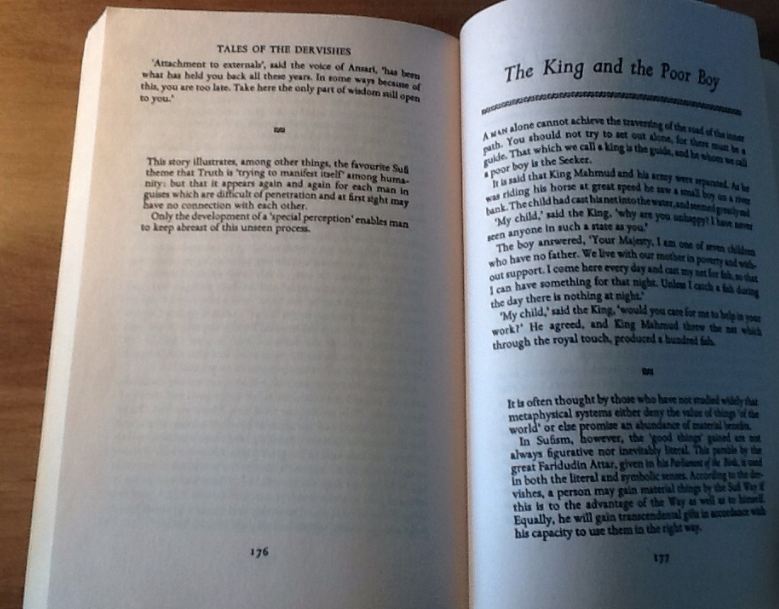
As you can see, on page 176, the text-flow breaks and the book continues only on the next page, starting with a chapter heading. This page break and the nice white space it creates lets the reader’s eyes rest before continuing. Also, it’s at these page breaks many people lay a book aside, starting their next reading session from the new chapter heading.
How do we accomplish this in an ebook which has no fixed pages, where the same amount of paragraphs could fill half a page or three?
Yes you guessed it…by using Styles!
Let’s take a look again at our manuscript in Open Office:
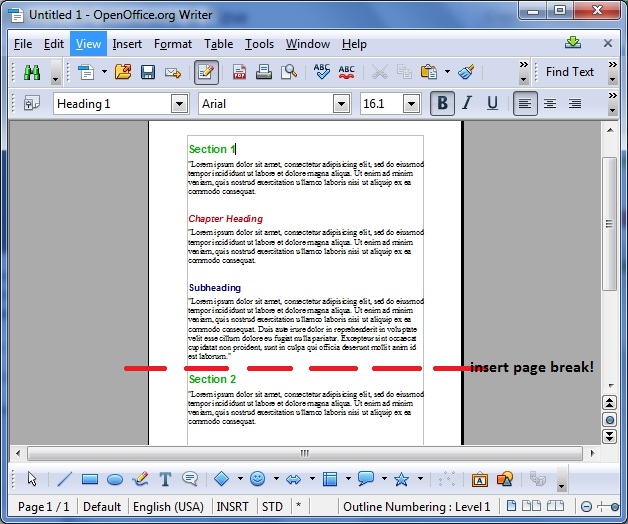
I’d like to have a page break just after the subheading and before the new section starts. Here’s what many people would do:
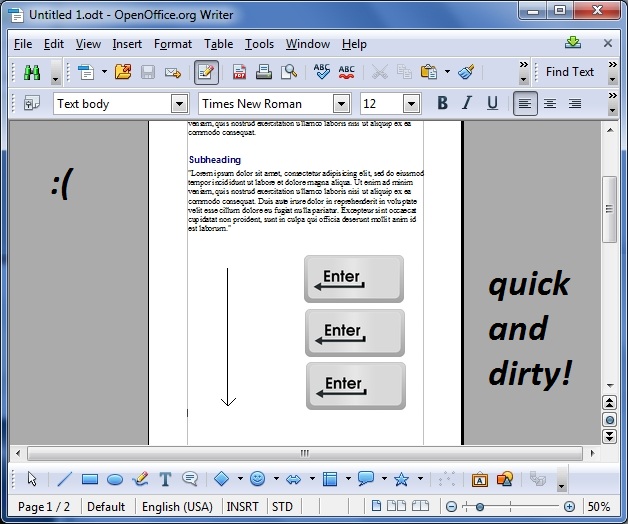
Yes, people would just hit enter 3 times, 6 times, 20 times, however many times it takes to get the cursor to the bottom of their page. It’s a bad habit from the age of the typewriter and it unnecessarily complicates digital text processing.
A BETTER (BUT FAR FROM PERFECT) ALTERNATIVE:
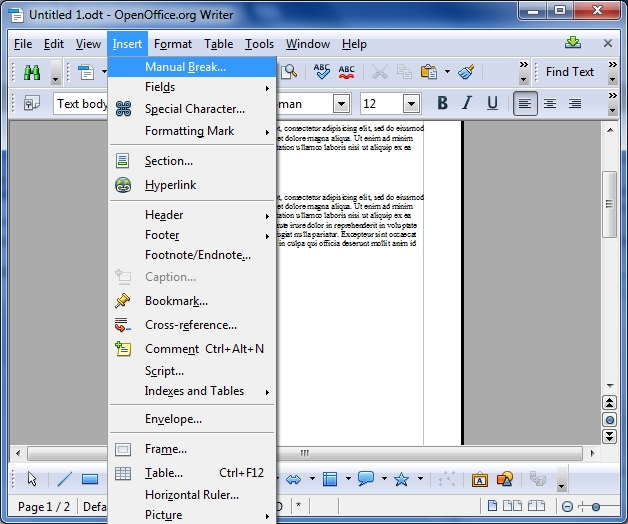
When you’ve finished writing your paragraph go to Insert >Manual Break or hit Shift + Enter
This will tell the text to stop its flow and continue on the next page.
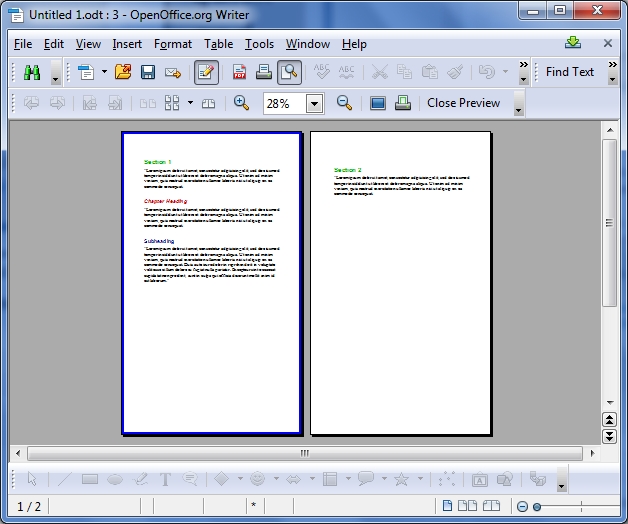
That’s exactly what we wanted! But what if there are dozens of different sections? We don’t want to insert all these page breaks manually! Styles will help us out, once again. Remember how to modify the Heading 1 style we chose for our section?
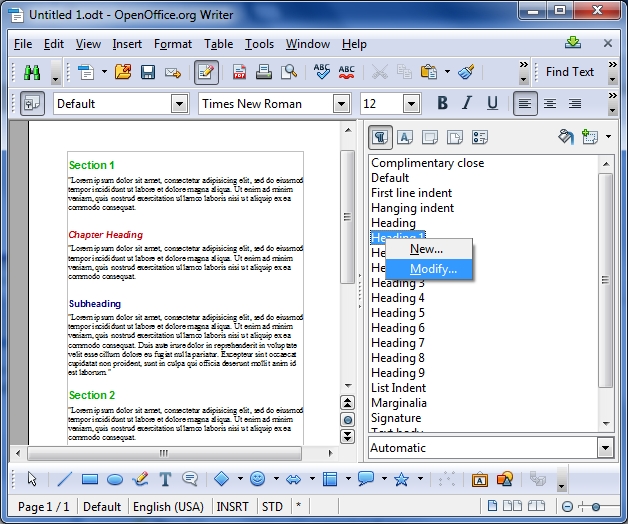
Yep. Open the Styles and Formatting window (shortcut: F11) and right click on Heading 1, then select Modify.
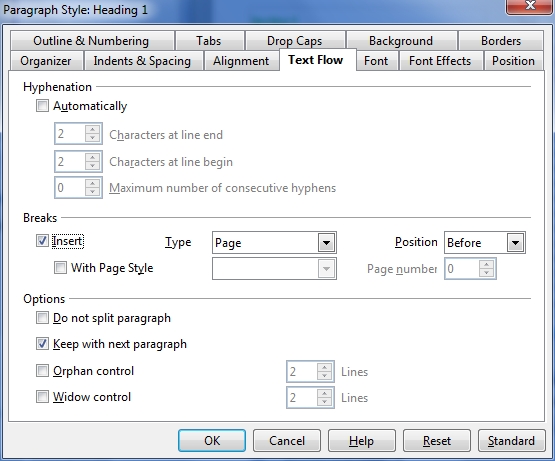
In the middle of the Text Flow tab where it says breaks, tick the Insert box and hit OK. Now Open Office will insert a page break whenever a new section starts, even if you haven’t written the section yet.
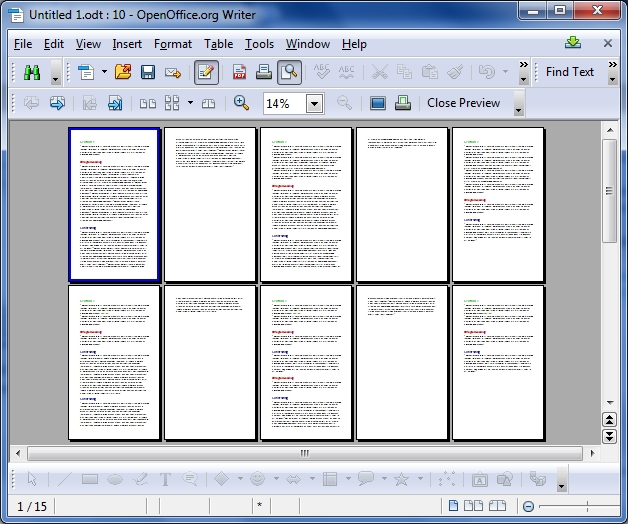
As you can see in the above preview, there’s now a page break before each Heading 1 section (green) appears, no matter how many chapters or sub-chapters there are, or how long they are. The Heading 1 always comes out on top of a new page, just from making the simple setting described above. Since this is a dynamic setting relative to the appearance of the headings, not to the length of the paragraphs or pages we see in Open Office, the same principle can be applied to ebooks.
— END OF PART #2 —
In the next post, we’ll (finally) take a look at the conversion process from Open Office format to ebook format.
—
Was this tutorial helpful? Did I miss something? What do you think? Leave a comment!
–

